Halloween DIY Drip Paint Pumpkins A Girl Named PJ
First up, dip in your cup and scoop up some paint: Then start pouring. I started with a rim around the top edge - not necessarily right around the stem, but out just a little where there's a top edge. Then work your way down and around from there. Remember that the runs will continue to grow after you're done dripping and adding paint, so.

Glow in the Dark Drip Paint Pumpkins
1. Place a pumpkin on a protected surface and a paper plate. 2. Mix Crayola Kids' Paint with a small amount of water in a plastic cup and mix with a craft stick. 3. Pour paint over the pumpkin and allow it to drip down the sides. 4. Use a rainbow of colors to create a colorful decoration! Allow it to dry and display.
Pumpkins Drip Painting Tutorial (No Carve DIY) (Colorful Fall Craft
Sensory Exploration: The sensation of paint dripping and splattering can be a sensory-rich experience for kids, engaging their tactile senses. Color Mixing: Kids can learn about color mixing as they see how different paint colors blend and interact on the pumpkin's surface. How to Make Drip Painted Pumpkins

Nine nocarve pumpkin ideas A Girl Named PJ
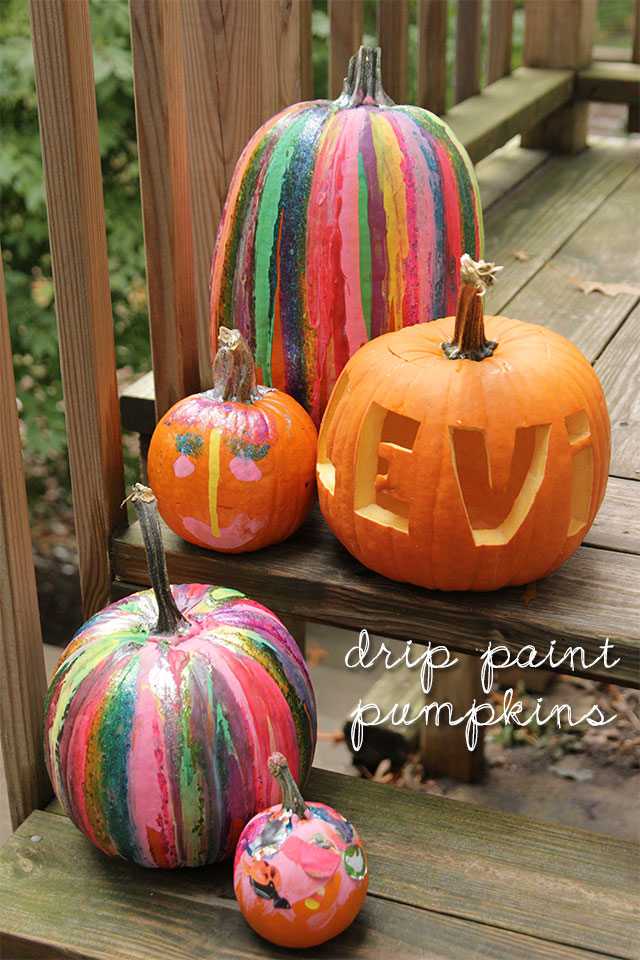
These paint-drip pumpkins are a bright and fun way to decorate for Halloween compared to going the traditional carving route. Just make sure to allocate enough dry-time before you need to bring them outside, and don't use newspapers to cover your work surface! PS: this project can be super cost effective, since all you need to buy are the.

Painted fake pumpkin with acrylic craft paint just pour and drip paint
Decorate for fall with a colorful painted pumpkin! Tune in every Friday for a new Crayola CIY video to learn fun and colorful ways to use your favorite Crayo.

How to Drip Paint Pumpkins Easy Pumpkin Decorating Idea Easy pumpkin
The post on MomDot described three methods. The first involved starting from the bottom and pouring the paint in stripes. In the second method, Stephanie's daughter sat a pumpkin straight up and.
Halloween DIY Drip Paint Pumpkins A Girl Named PJ
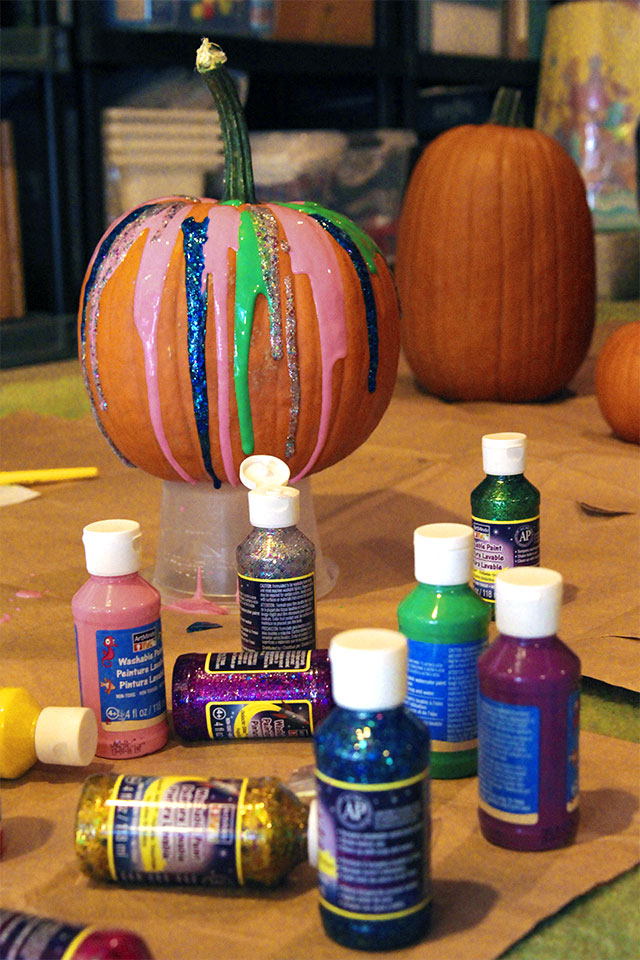
something to elevate your pumpkin (we used a disposable Tupperware container) newspapers, paper bags, or a plastic table/floor covering; clear acrylic sealer; I was inspired to make a drip paint pumpkin after sharing Stacy's painted pumpkins in my no-carve pumpkin decorating round-up. Levi was incredibly excited, repeatedly asking if it was.

Drip paint pumpkin using florescent paint Pumpkin Uses, Florescent
Step 1: Buy the right paint supplies. We do this with super cheap paint squeeze paint from Ikea. It's not available online, but there are other options that I've outlined for you below. A cheap paint option for drip paint pumpkins is to buy these squeeze bottles from Amazon and fill them up with inexpensive paint.
Glow in the Dark Drip Paint Pumpkins
For a fun Halloween craft for kids, drip paint onto pumpkins to create a colorful look.Subscribe to the Better Homes and Gardens Channel: http://www.youtube..

Mr. Kate DIY DripPaint Pumpkin Vase
Home Projects Neon Paint Drip Pumpkin. 35% Off New Products! Save 35% on orders $75+ and get free U.S. ground shipping! Explore the NEW! FolkArt Glitterific Pastels and NEW! FolkArt Paint For Plastic! This promotion cannot be combined with other promos. See shipping details. Use Code.

No carve Drip Paint Pumpkin Craft To Art
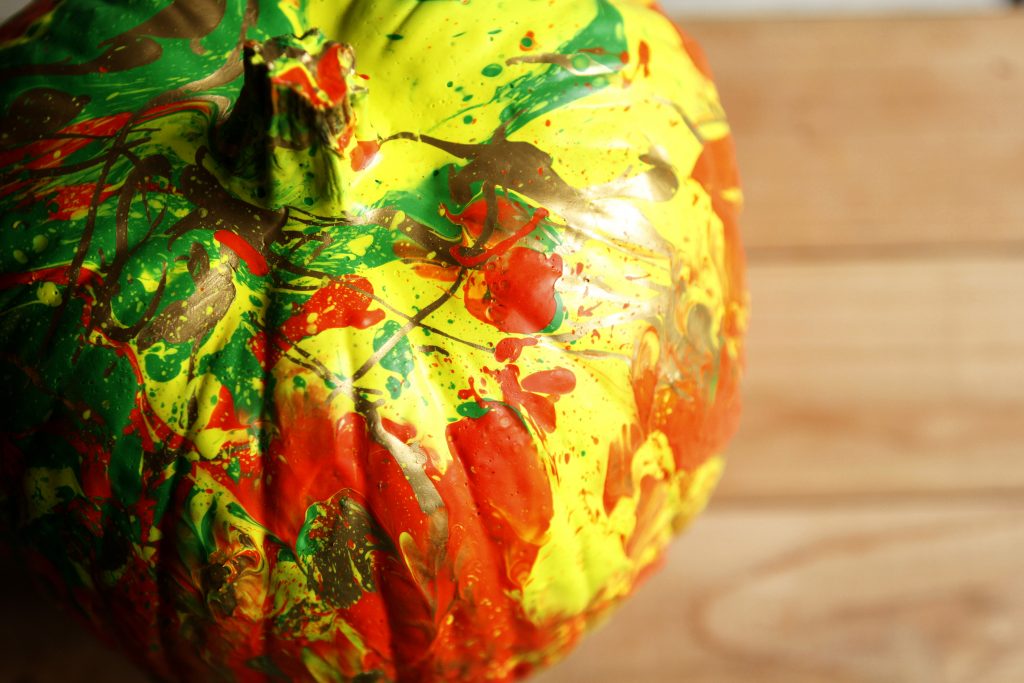
They squeezed a generous amount of paint onto the top of the pumpkin, allowing it to drip down the sides due to the force of gravity. The end result was quite beautiful. The paint cracked a bit when it dried, but the overall look was still quite striking. Some of the colors blended together a bit, creating new and beautiful color combinations.

Drip Painting No Carve Pumpkin DIY for Halloween Endless creativity
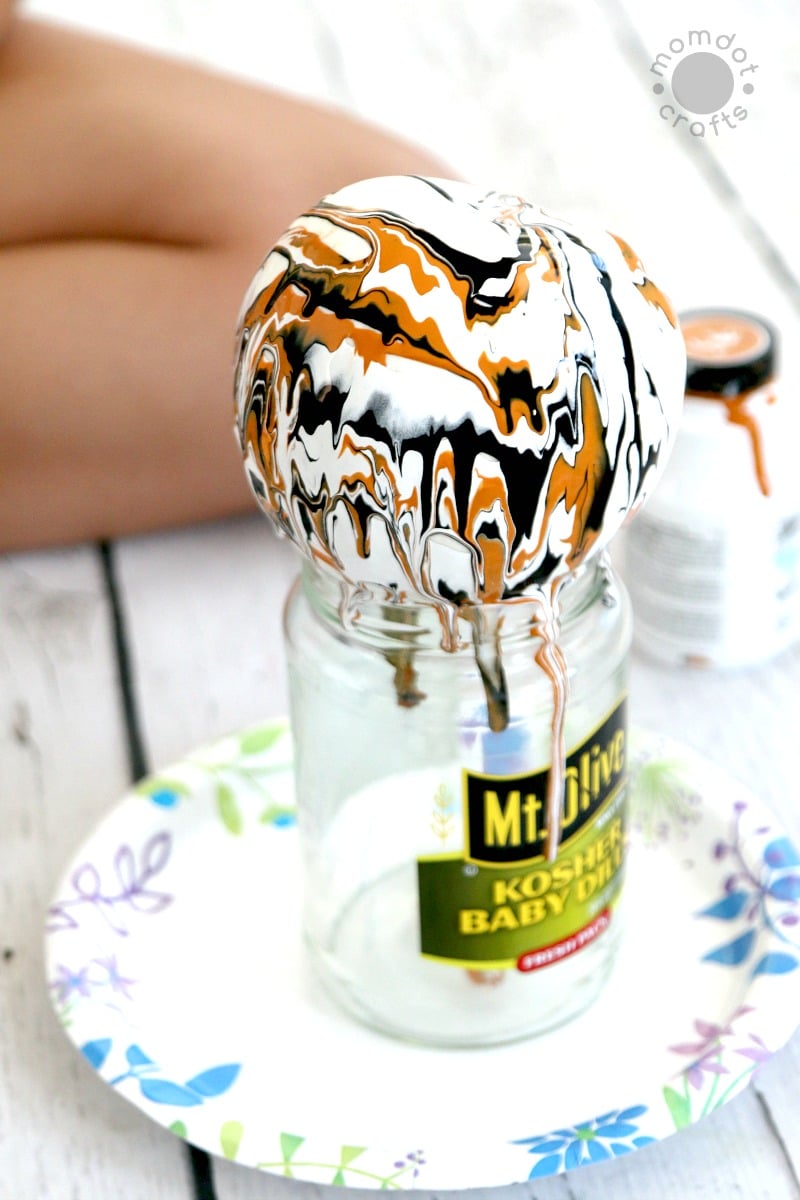
Start by pouring one color of paint onto the top of the pumpkin around the stem. Hold on to the pumpkin's stem and slowly rotate and tilt the pumpkin to allow the paint to flow down the side of the pumpkin. Let the excess paint flow down onto whatever you have used to protect your work area. While that paint is still wet, pour on the second.

DIY PAINTDRIP PUMPKIN DECORATING TabMUA YouTube
It goes on milky but dries clear. Allow it to dry. Place the pumpkin on a piece of wax paper and drip glitter paint from the top of the pumpkin so that it dribbles down the sides. Allow it to dry for several hours, occasionally moving it so it doesn't stick to the wax paper.

Colorful Rainbow No Carve Drip Paint Pumpkins Bebe and Bear
This Drip Paint DIY Pumpkin Painting activity is super fun. Fall is here and we parents are in search of fun fall activities and crafts to do with our kids. This Drip Paint DIY Pumpkin Painting.

Pumpkins Drip Painting Tutorial (No Carve DIY) (Colorful Fall Craft
To get started with this pumpkin drip painting tutorial, you will need a few things. Milk Paint: Before anyone emails me and asks if you can use other paints, I am not sure, but you can try acrylic paint. Milk paint provides really nice thick coverage, blends well, and dries quickly. It doesn't smell that great, but it works fantastically.

Colorful Rainbow No Carve Drip Paint Pumpkins Bebe and Bear
We used children's acrylic paints straight from the bottle so that they would be easy to squeeze out in a controlled way. Cakie simply squeezed the colours directly onto the top of the pumpkins, then let the paint start to slowly dribble down the sides! It is important to use a thicker paint like acrylic as it needs to move slowly down the side.